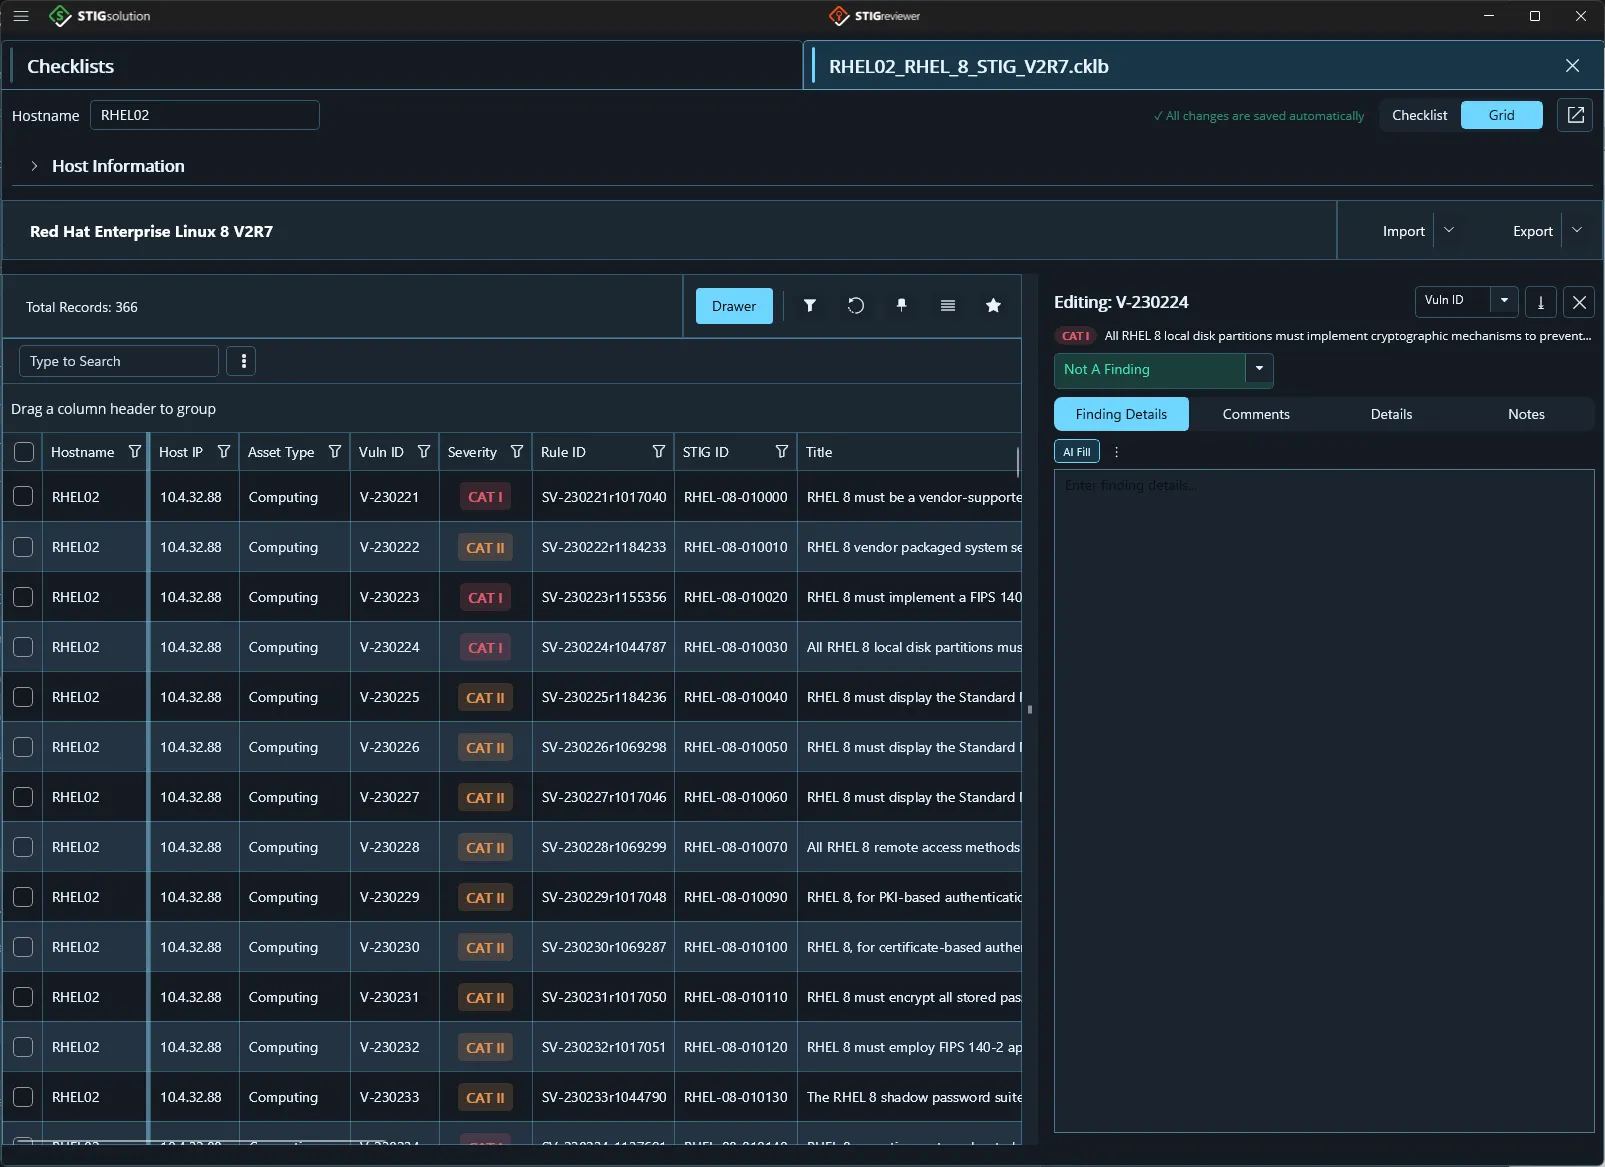
The Grid view
The Grid view shows your checklist as a single wide table where every field is visible at once. It is especially useful when you have a lot of small status changes to make.
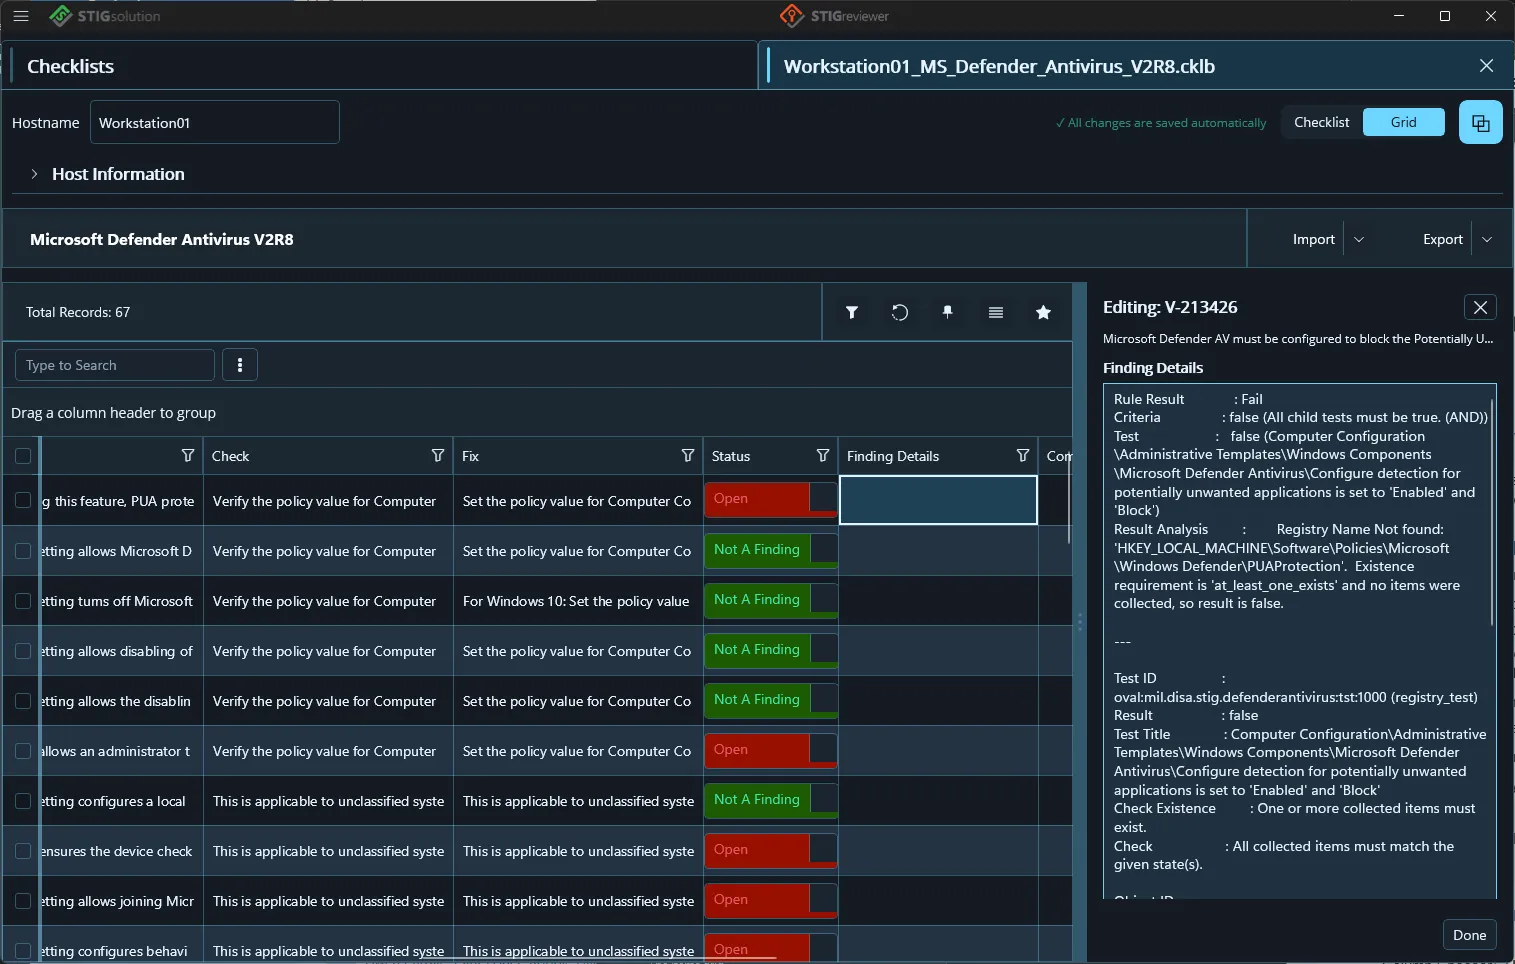
Editing in the grid
Section titled “Editing in the grid”The columns you can edit inline are:
- Status — click the colored pill in the Status column and pick a new value.
Finding Details and Comments are shown in the grid for reference, but you usually want more space to edit them. When you click on the Finding Details or Comments cell for a row, a drawer panel slides in from the right side of the grid:
-
The drawer header shows “Editing: <Vuln ID>” followed by the item title.
-
The body is a full rich-text editor with auto-resize.
-
Click Done or the ✕ button to close the drawer.
-
Drag the gray handle to make the drawer wider or narrower.
Saving and reusing grid layouts
Section titled “Saving and reusing grid layouts”The Grid view has a Manage Layouts icon button at the end of the right-hand toolbar (after the Column Chooser). Use it when you regularly switch between different ways of looking at a checklist — for example, one layout that focuses on Open findings and another that focuses on Comments review.
Click the button to open the Layout Manager. From here you can:
-
Save the current layout — type a name into the Layout name box at the top and click Save. The layout captures your column widths, order, visibility, sort, filter, and grouping.
-
Load a saved layout — click Load next to any layout in the Saved Layouts list to apply it.
-
Delete a saved layout — click the ✕ button next to any saved layout to remove it.
If you have not yet saved any layouts, the Saved Layouts area shows “No saved layouts yet.” This is separate from STIGreviewer’s normal grid memory: the application always remembers your most recent column widths, order, and sorts between sessions, but saved layouts let you keep several configurations on hand and switch between them by name.
The redesigned drawer
Section titled “The redesigned drawer”Clicking a row opens the details drawer. If you would rather click rows without the drawer appearing, open the View menu in the right-hand toolbar and turn off “Open details on row click.” A docking button at the top of the drawer lets you dock it to the right (default) or to the bottom of the grid, whichever fits your monitor better.
Inside the drawer, a segmented control gives you five tabs:
-
Finding Details — the same rich-text editor you had before. Autosaves.
-
Comments — the same rich-text editor you had before. Autosaves.
-
Details — new tab that shows Control, AP, and CCI along with the read-only Discussion, Check, Fix, and Revision text from the STIG, all in one panel.
-
Notes — the same Notes panel described in chapter 7 (Open / New buttons, target-file drop-down, editable notes list).
-
Answers — the Evaluate-STIG answer file panel for this check. See chapter 11.
At the top of the drawer there is also a Show ID picker that lets you decide which identifier (Vuln ID, Rule ID, or STIG ID) appears in the drawer header for the current item.
New grid columns
Section titled “New grid columns”The Grid view now has several additional columns you can turn on with the Column Chooser:
-
Hostname, Host IP, Asset Type — useful when you have multi-STIG or aggregated checklists open.
-
Discussion, Check, Fix — the long-form STIG text next to each item.
-
Notes — a summary of the notes for each row (up to two lines). Tapping the cell opens the drawer’s Notes tab.