Editing a checklist
Opening a checklist
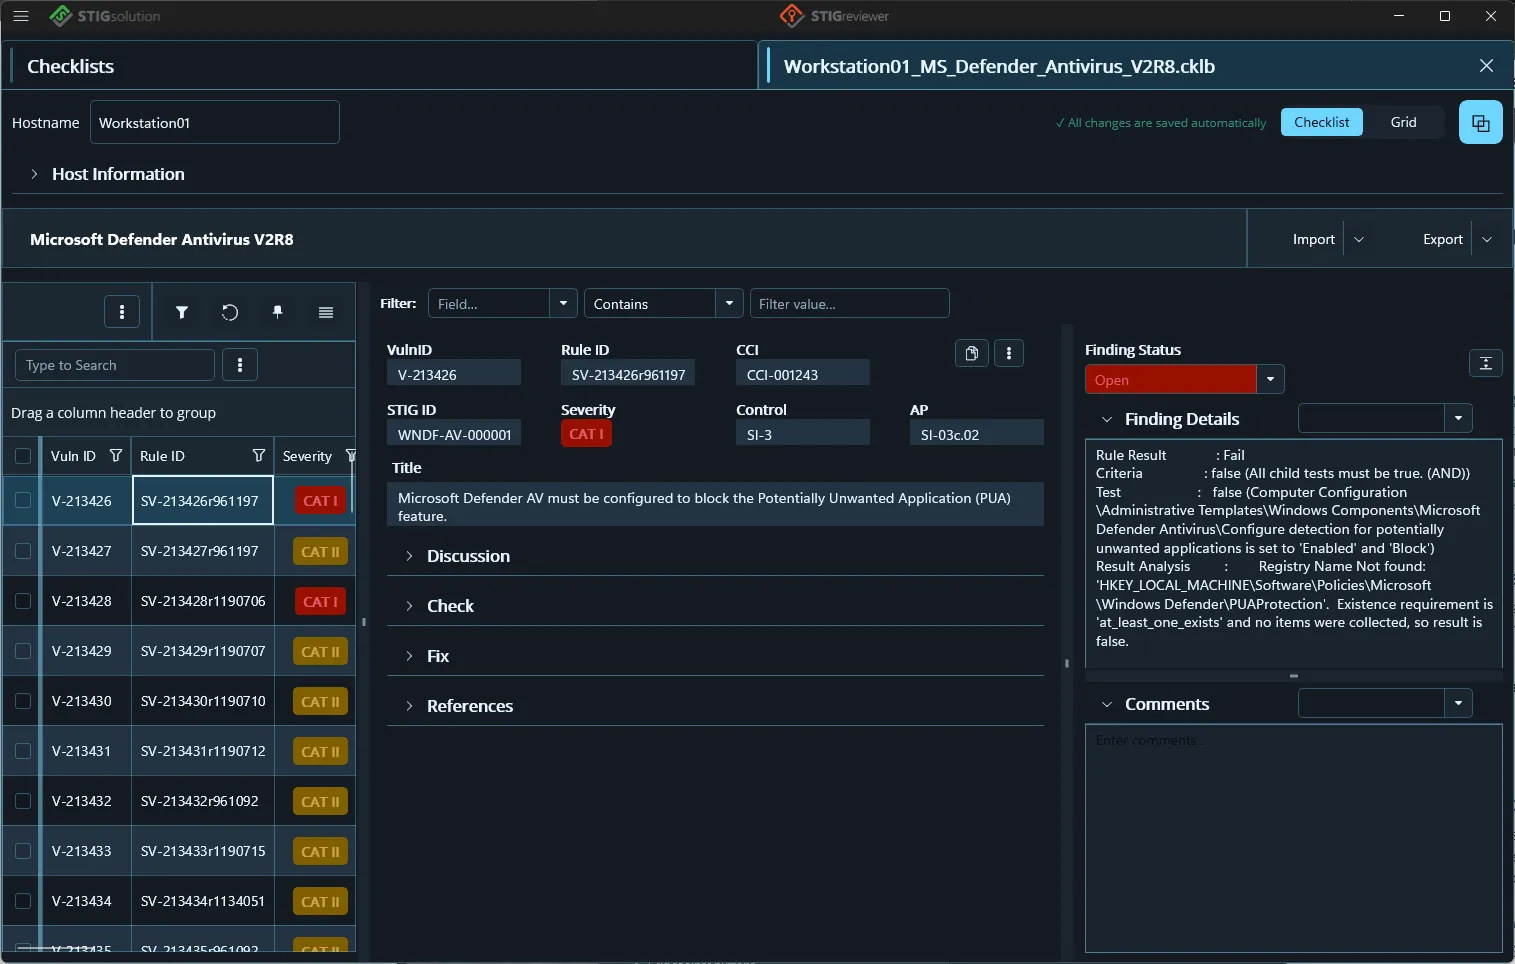
Section titled “Opening a checklist”Click the pencil (Edit) button on any row in the inventory grid. A new tab is added to the Checklists page using the filename as the tab title, and the checklist opens for editing.
Each checklist tab has an ✕ button on its header so you can close it. The first tab (the inventory) cannot be closed.
The save indicator
Section titled “The save indicator”STIGreviewer autosaves all of your changes — there is no Save button. Look for the status text on the right side of the editor header:
-
Saving… — a change is currently being written.
-
✓ All changes are saved automatically — the latest change has been written successfully.
-
⚠ Save failed — STIGreviewer could not write the change. Check the file is not read-only or open in another application.
Popping a checklist out into its own window
Section titled “Popping a checklist out into its own window”On Windows and macOS, click the Pop Out icon button (link-external glyph, top-right of the editor header) to open the current checklist in its own desktop window. This is useful when you want to view two checklists side-by-side on different monitors.
Switching between Checklist view and Grid view
Section titled “Switching between Checklist view and Grid view”Use the Checklist / Grid segmented control next to the Pop Out button to switch how the checklist is displayed:
-
Checklist — the default. A list of items on the left and a detail pane on the right showing the full requirement text and the editable fields. Best for reviewing one finding at a time.
-
Grid — a single wide grid where you can edit Status, Finding Details, and Comments inline. Best when you have many findings to update quickly.
Both views always show the same data — switching back and forth does not affect your changes.
The Classification Banner
Section titled “The Classification Banner”Across the top of every open checklist sits a colored classification banner. The banner’s color and label come from the checklist’s Classification field (see Host Information below) and are intended to give you a clear visual reminder of how the contents of the open checklist may be handled.
If a checklist has no meaningful classification set, the banner is hidden. To change a checklist’s classification, open the Host Information expander and pick a value from the Classification dropdown. The set of available values is configured on the Business Rules page (see chapter 15).
Host Information
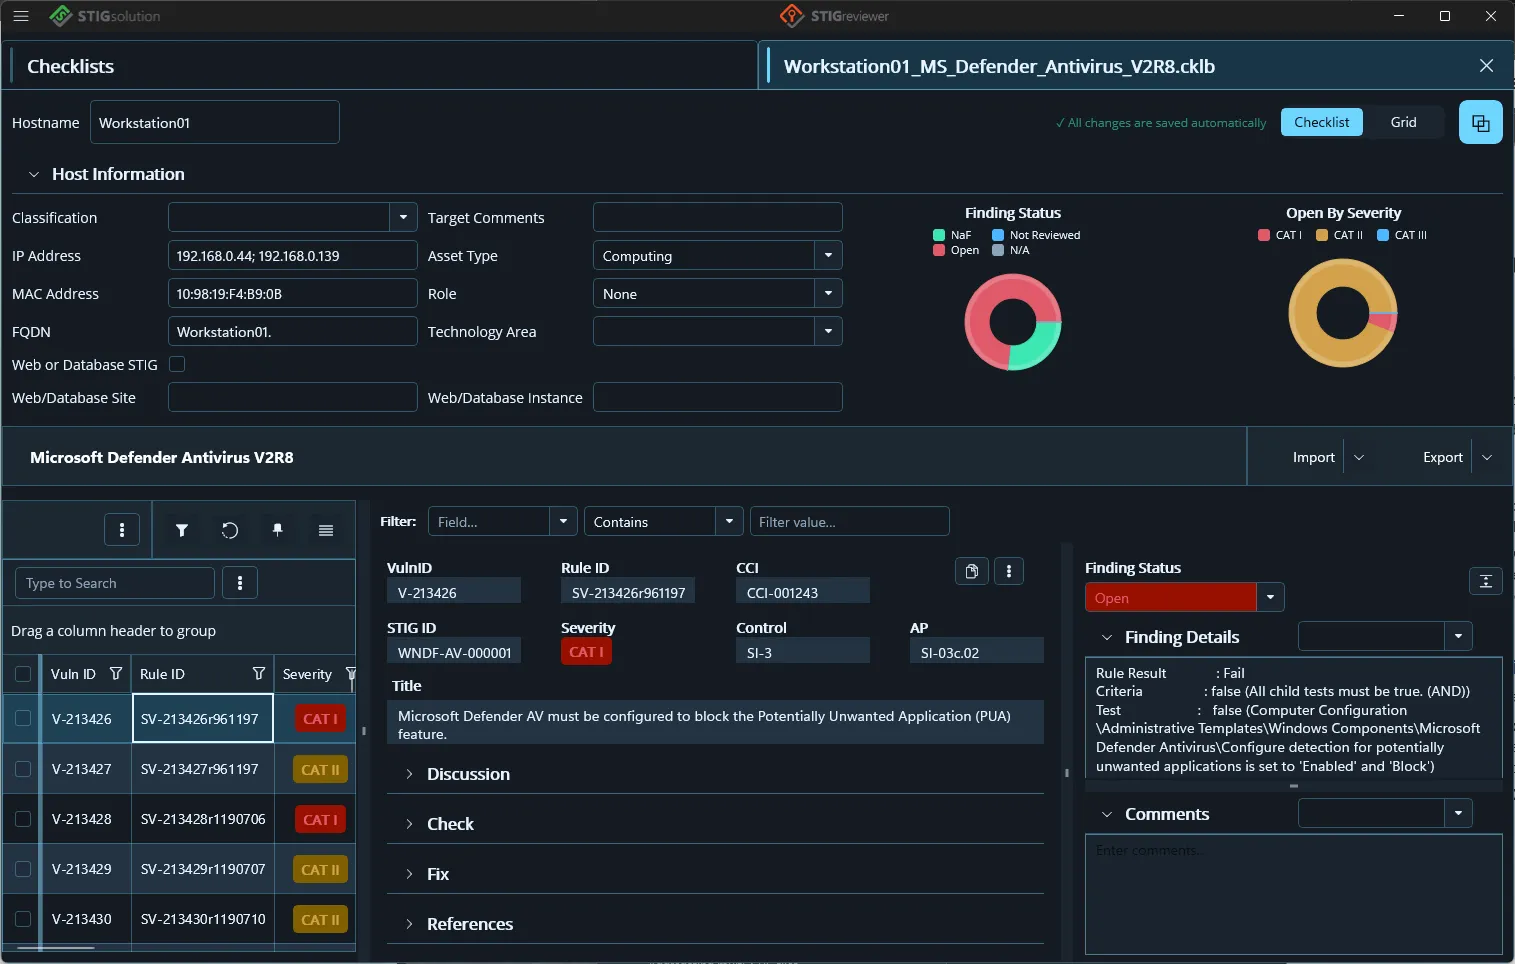
Section titled “Host Information”Below the editor header you will see the Host Information expander. Click the header bar to expand or collapse it. The Finding Status and Open By Severity donut charts also live inside this expander (on the right), so they are only visible when the expander is open. The fields available are (note that the order has changed — Asset Type is now further down the list, after Target Comments):
-
Classification (dropdown) — the classification that applies to the checklist. The choice you make here is mirrored by the Classification Banner at the top of the page (see “The Classification Banner” above). The list of values is managed on the Business Rules page.
-
IP Address.
-
MAC Address.
-
FQDN (fully qualified domain name).
-
Target Comments.
-
Asset Type (dropdown).
-
Role (dropdown).
-
Technology Area (dropdown).
-
Web or Database STIG checkbox, plus Web/Database Site and Web/Database Instance fields.
On the right side of the Host Information panel are two donut charts:
-
Finding Status — the breakdown of items by Not a Finding, Not Reviewed, Open, and Not Applicable.
-
Open By Severity — the breakdown of items by CAT I, CAT II, and CAT III. The chart focuses on items whose status is Open, so you can see at a glance where your remaining findings are concentrated.
Update Checklist and Convert to CKLB
Section titled “Update Checklist and Convert to CKLB”Two action buttons appear in the toolbar when they are relevant:
-
Update Checklist — appears when your STIG Library contains a newer version of the STIG this checklist uses. Click it to update the checklist to the latest version while preserving your answers where the rules are unchanged.
-
Convert to CKLB — appears on CKL files. Converts the file to the newer CKLB (JSON) format.